The Importance of Efficient Sample Storage in Modern Labs

Anyone who works in a lab will tell you that samples are like gold—and misplacing any sample can be disastrous. Thankfully, you can avoid this by having continuous traceability built into your sample management software. That way, your lab staff can easily access where each sample is stored, at any time. Having a complete, up-to-the-moment view of your sample storage, location, and status is essential to eliminating issues and ensuring smooth lab processes.
Watch our video demonstrating Lockbox LIMS storage management capabilities!
All labs, especially clinical labs, need a sample tracking software solution to get this done; a solution that not only tracks sample storage and status, but that also meets a myriad of compliance, regulatory, and security requirements.
If you manage a smaller lab, you might think your makeshift method to track each new sample works well. You assess that an Excel workbook or Access database is fine for sample management. The problem is all the sample tracking work—accurate sample storage information, tracking each sample across your lab and through your testing processes—relies solely on manual activity. This is a surefire recipe for sample management mishaps, regardless of the size of your lab. At best, you have an inefficient record-keeping process. At worst, you risk misplaced samples and incorrect information for your entire lab.
Luckily, the storage management functionality in a Laboratory Information Management System (LIMS) can ensure accuracy, improve efficiency, and meet the variety of requirements mentioned above. But how does a LIMS work? How does it manage sample storage? With what kind of information does it keep your lab processes running efficiently?
The answers are below. Here’s how the right system tracks each sample as it moves through your laboratory workflow.
Step 1: Creating a Location for Sample Storage
To begin modelling your sample storage architecture, start at the highest level: the rooms in your facility. Each room through which a sample might travel should be represented in your LIMS as a “location.” This includes your lab space, any rooms containing storage equipment, and possibly the location where each new sample is received or where samples are accessioned.
You may also need to create sub-locations, defining areas within a larger lab. For example, if people typically refer to your lab in terms of having a “front” or “back,” you may have equipment in both places you’ll want to account for. Within your LIMS, you might create a parent-level “location” record for the lab in general, and then child-level “sub-locations” to represent areas in the front and back of the lab where samples are stored or activity takes place. In this case, “front” and “back” are locations feeding up to the larger “lab”. Giving your sample storage locations that level of specificity, and seeing the relationship, helps your staff locate a sample immediately.
Step 2: Creating Sample Storage Equipment Designations
Next, you’re ready to move one level down in the sample storage hierarchy, to create records that represent your storage units. An ideal LIMS gives you the ability to categorize your equipment into “refrigerators,” “freezers,” and “nitrogen tanks,” since each of these has unique sample storage attributes.
For example, your refrigerators may just have shelves, your freezers may have shelves and racks, and your tanks may just have racks. Your LIMS should also be a freezer management software that supports custom sample storage configurations for each storage element. Why? Because wherever a sample can be stored, a LIMS must be able to give you as specific a location as possible. Each refrigerator may have a unique number of shelves, each freezer may have a different number of racks per shelf, and so on. You should be able to access those details. After you create and configure each piece of your sample storage equipment (shelves, racks), you’ll then assign each instance of storage equipment (refrigerator, freezer) to one of the locations (front, back) created in step 1.
Once this is completed, any LIMS user in your lab can easily see which equipment is in which room, and how each of those sample storage units is configured. Eventually, within the LIMS, they’ll be able to see which samples are located in each freezer or refrigerator, and on each shelf or rack.
Step 3: Creating Containers for Sample Storage
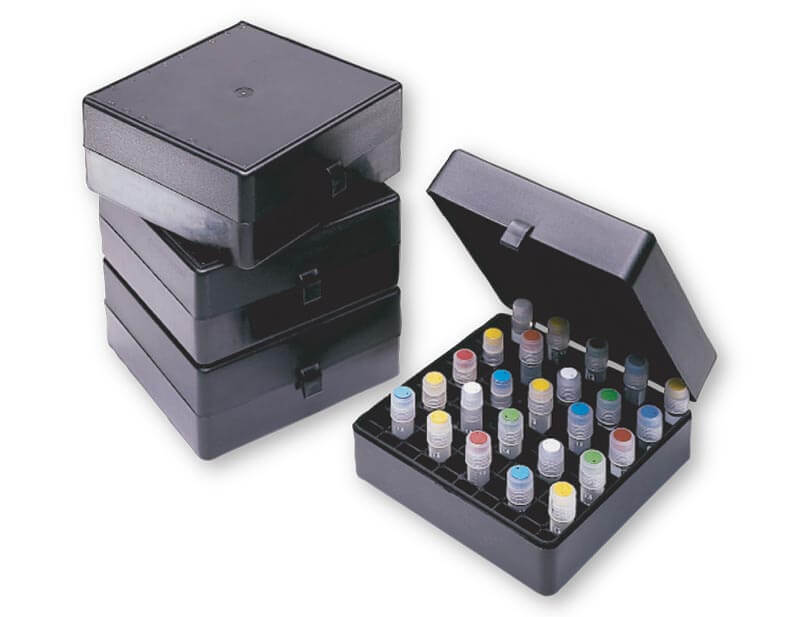
After you’ve created storage units within your LIMS, and assigned each storage unit to a location, it’s time to go further down in the hierarchy. You’ll need to create the containers within those storage units, each of which will contain your samples. Typically, containers are defined as either a “box” or a “plate.” Within a LIMS, you should be able to customize the size of each box, and visually represent each sample in its position in the box. Similarly, you should be able to easily assign samples to a plate. After each sample has been assigned to a box or plate, you will then assign each container to its appropriate rack or shelf in your storage equipment.
The Result: A Sample Storage System with End-to-End Traceability
After you create this storage ecosystem for your lab, you’re ready to take full advantage of your Laboratory Information Management System. Each LIMS user will be able to see the exact location of each sample simply by viewing the storage details on the sample record.
The details within a sample record move up the storage hierarchy progressively, progressing from smallest designation to largest. First, a sample record shows the position of a sample within a box or plate; then, the specific rack or shelf where that box is located; next, the storage unit within that rack or shelf; and, finally, the location of that storage unit within your lab.
As you move your samples from room to room, from a box to a plate, and then back into a box, a LIMS should record this location history within a table associated with each sample. This history makes it easy to track the complete chain of custody for each sample, including the exact date and time of each action or movement, and the person who moved the sample.
Clear, simple, traceable. Treating every sample in your lab like gold means knowing where every sample is. When you implement sample management like this into your lab processes, you’ll never lack the information that can lead a lab to misplace a sample or miss testing it.

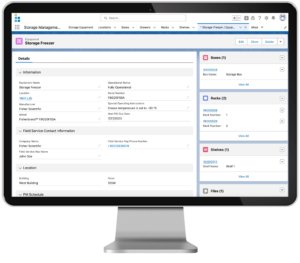
Lockbox LIMS Storage Equipment Record Page
Next Steps
If you are an existing Lockbox Laboratory Information Management System subscriber, you can begin modeling your sample storage ecosystem immediately within Lockbox. Need help or have questions? Contact your Customer Success Manager or create a case in the customer support center.
If you are not yet a Lockbox LIMS subscriber, please contact us to set up a custom demo and receive a free 15-day trial to see how easily you can use Lockbox to implement the sample storage best practices described above.