Understanding the Benefits of a Phased LIMS Implementation
Implementing a laboratory information management system (LIMS) might be one of your lab’s most critical initiatives. The benefits of a LIMS are numerous. Today, some LIMS, such as Lockbox, contains so many features that virtually every aspect of the lab can be positively impacted by the system.
However, because modern LIMS have so many features, it is crucial to strategically plan what features you will implement and in what sequence. A thoughtful implementation plan will minimize your project’s overall risk and add value to your end users as soon as possible.
A highly recommended plan is a phased implementation (versus a ‘big bang’ approach), which allows your team to automate workflows and processes one at a time.
This way, your team can focus on improving just one aspect of the lab before moving on to the next. And your users will appreciate only having to learn bite-sized components of the system’s functionality at once.
Lastly, your lab will benefit from a reduced Time to Value (TTV) due to a phased implementation process.
If your lab tries to develop and implement the entire LIMS at once, you may launch a system that doesn’t adequately meet your end-users’ most critical requirements and overwhelm them with a steep learning curve.
In this article, we’re going to explore a phased framework for LIMS implementation, but keep in mind these phases are certainly not the only way to implement a LIMS.
Before we dive into the heart of the implementation, let’s take a quick step back and answer the fundamental question:
What is a LIMS?
A laboratory information management system (LIMS) is a software application that allows you to manage all aspects of your laboratory, from initial sample receipt through result reporting. This includes sample lineage/hierarchy, equipment management, material/lab supply management, and workflows/protocols.
In addition, the LIMS can also manage activities that occur before the wet lab bench work and post-bench activities, including automating clinician and provider activities via a provider portal, logistics management for sample collection kits, and PDF report distribution.
Now that we understand what a LIMS is, let’s look at the five-phase implementation framework to make your system a success:
Phase 1: Sample Management
One of the most critical features of a LIMS is the ability to manage samples. This includes knowing what samples you currently have in your lab, what has been done with them, and where they are physically located.
Lockbox LIMS Sample Record
The LIMS functionality that manages these aspects is a great candidate for a Phase 1 launch. Phase 1 is generally something you want to launch quickly so that your lab can immediately benefit from the LIMS.
Here is a more detailed breakdown of those features that we recommend in this phase:
Sample Testing Management
Probably the most critical feature of a LIMS is knowing what samples you have in your lab and their status.
What is the barcode label of the sample? Has the specific sample been received, is it currently being tested, or is testing complete? What are all the samples that require testing right now? If your lab tests many samples, one of your biggest pain points will be playing traffic cop for every sample.
General sample testing management is the answer to this problem. It is also one of the easiest portions of a LIMS to configure and implement.
Sample Location Management
Understanding where your samples are located can also be important in Phase 1. Knowing their exact physical location can be extremely useful if you are testing many samples at once or commonly re-test samples.
The location management could be more general, such as only providing the name of the box in which a sample is located, or perhaps your lab wants to track the exact box, rack, shelf, and freezer in which a sample is located. This level of location management prevents you from losing samples and can save your lab time rummaging around in your refrigerators and freezers.
Also Read: Step-by-Step LIMS Implementation for Laboratory Management
Phase 2: Protocol Execution and Data Analysis
Once you have general sample management up and running, a great next feature to implement is the management of your testing workflows and protocols. This protocol execution phase can include detailed instructions for testing personnel and extensive data collection and analysis for your samples.

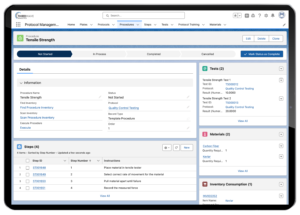
Lockbox LIMS Protocol Management
Protocol Execution
Some labs only require documenting which protocol was run on a sample, which can be achieved easily in Phase 1. This could be a simple picklist on a sample record that indicates which protocol was executed on the sample.
However, some labs have a variety of complex protocols and need to have the specific protocol testing steps displayed within the LIMS for lab techs. In addition, using the LIMS to manage protocol versioning can ensure that testing personnel is always accurately testing samples with the most up-to-date protocol.
Data Capture and Analysis
It is very common to capture information throughout the testing process. This could be data specific to the sample (e.g., DNA concentration after DNA extraction) or general testing information (e.g., the personnel that performed testing or the instruments used).
Capturing discrete and specific data throughout the testing process requires that a specific protocol is created for each test that is performed. The benefit of implementing this type of protocol is that you can also perform automatic analyses of the captured data.
For example, if you capture a sequencing library’s concentration and average fragment size in the DNA sequencing workflow scenario, the LIMS can automatically calculate your sequencing library molarity.
Phase 3- Inventory/Reagent Lot and Equipment Management
Inventory and reagent lot management can be an invaluable benefit of your LIMS. However, it can also be tricky to develop, so it is generally recommended to implement this feature in a later phase after your sample management and protocol execution are fully in production.

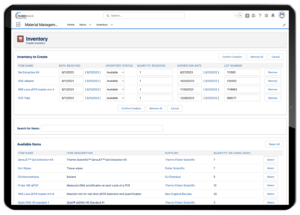
Lockbox LIMS Inventory Management
Record Reagent Lots
Capturing the specific lots of reagents used during sample testing can be an incredibly important piece of information to gather during protocol execution. However, capturing this information may be a bit more complicated than just scanning a lot barcode during protocol execution.
Your lab may want to put in place additional constraints – such as only allowing reagents that have passed QC to be used or not allowing expired reagents. Your lab may also benefit from the traceability of knowing which samples were tested using which reagent lots. Therefore, it can be beneficial to create specific database records to represent each Inventory record for each reagent lot that is used.
This additional layer of complexity can be a lifesaver when you determine that a specific lot of a reagent has an issue, but this complexity can also be tricky to set up for your specific testing workflows. Therefore, it is highly recommended to have both Phase 1 and 2 established before you add this functionality to your system.
Inventory/Reagent Usage Management
Some LIMS also includes the ability to calculate how much of a specific inventory/reagent is needed to test each sample. This allows you to quickly determine how much of each reagent you need for future experiments without physically counting it out.
You can also configure your LIMS to generate automated alerts from the LIMS when it’s time to order more reagents, which can be extremely useful.
However, these features can take time to configure fully. Some technicians make additional dead volume during reagent prep or remake a reagent that became contaminated. That’s why we highly recommend having both Phase 1 and 2 established before you add this functionality to your system.
Equipment Management
Many labs also need to manage and track their testing equipment in a more in-depth manner.
This type of management can include:
- Capturing equipment used during testing
- Tracking the equipment’s calibration/maintenance
- Equipment scheduling
- Extensive equipment documentation (e.g., calibration, maintenance, and/or cleaning logs)
Again, this type of management requires that your lab understands its testing processes pretty well and knows exactly what kind of functionality you require regarding your equipment. Therefore, it is recommended to implement equipment management after Phases 1 and 2 are completed.

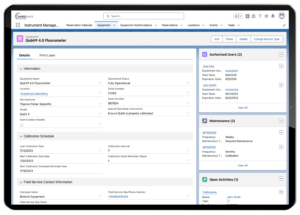
Lockbox LIMS Equipment Record
Phase 4: User Experience Improvements and Complex LIMS Automation
The functionality most often implemented in phases 1-3 is considered to be the core functionality of LIMS for many labs. Once these initial phases are implemented, the LIMS is on its way to accurately capture the majority of activities done in your lab. The next phase that labs typically tackle is usability.
Fine-tuning the functionality implemented in phases 1-3 by automating manual processes and providing better error handling can make your end-users’ experience much more streamlined. Let’s take a look at both of these:
Improve Efficiency
Although a LIMS can easily be set up to store data, getting data actually entered into the LIMS in a streamlined manner is something that can require additional work.
When features are first implemented, they will most likely require users to navigate to certain screens and enter information manually.
To improve the end-users LIMS experience, labs can redesign the input screens and steps to make this data entry as effortless as possible. In addition, automation throughout the process can take data input tasks off your end-users to-do list. In an ideal world, your users only briefly interact with your LIMS, allowing them to spend as much time in the lab testing samples.
Reduce Errors
Many processes in the LIMS can rely on manual user input, calculations, and/or data entry. Anything that a user manually performs can lead to errors
In your project’s fourth phase, it can be very beneficial to implement automation in the LIMS to create more complex error handling so that the system prevents users from entering incorrect data or data in incorrect places. This involves creating validation rules and other field-level constraints that alert the user when they are entering data incorrectly.
Phase 5: Build Custom Features For Your Lab
Labs may need specific features in their LIMS that are normally included in the “out-of-the-box” capabilities of a LIMS. These customizations can help automate key processes, reduce manual data entry, and provide specific features to support a lab’s unique workflow.
While very important, developing these features does require an additional budget. Therefore, the best practices recommendation is to wait on embarking on this custom development until the features implemented in phases 1-4 have been in use for several months.
Once you have that experience with your LIMS, you will be in a much better place to spec out what the custom automation should do, decreasing the risk of needing to change the customizations in the future.
There are many types of specialized features that your lab may require. Depending on the LIMS that your lab chooses, these may or may not be considered “custom” features.
1. Document Control
Keeping track of all the controlled documents in your lab requires a document control system. If your LIMS offers this feature, it may be prudent to explore using your LIMS for this feature.
These documents could range from informal processes to those that require extensive review/approval.
Document control is very important for labs with regulatory requirements. Before you decide how to manage your documents, ensure you fully understand your regulatory obligations and confirm that your LIMS has the features to meet them.
There are some LIMS, such as Lockbox LIMS, which do include a full Document Control module. However, not all LIMS do, so be sure to confirm with your vendor.
2. Reporting
Depending on the types of tests your lab is running, you may need highly customized reports. These reports might need to show the results of tests for a single sample or the summarized results from hundreds of samples.
In this phase of your implementation, you should spend time building the specific reports your lab or your customers need. Since reporting is so specific to the tests you are running, you will most likely need to configure the reports for your lab.
3. Integrations with Other Systems
The last and perhaps most crucial aspect of your LIMS implementation is integrating it with your other systems, databases, and instruments.
Integrations allow you to automatically push testing results directly into your LIMS from desktop analyzers without any user intervention, saving you time and preventing errors.
Additionally, clinical testing labs may wish to integrate with an EHR system (electronic health record system) or your local Dept of Health, which can facilitate expedited test ordering and reporting.
While integrations are extremely beneficial, they require custom software development since each interface depends on the field names in your target and sourced systems.
Another challenge with integrations is that some 3rd party systems do not contain the modern APIs (application programming interfaces) that would make an interface easy to develop.
Fortunately, Lockbox LIMS does contain the full suite of modern APIs that you would require to integrate with third-party systems, so the burden would be on those other systems to have the modern APIs as well.
Summary: Develop and Implement Your LIMS in Phases!
Configuring and implementing your LIMS in multiple phases is one of the most beneficial things that you can do to ensure a successful LIMS initiative for your lab.
A phased approach will allow you to realize the benefits of some functionality quickly and then give you the time to develop the more complex functionality.
LIMS users will also greatly appreciate a phased implementation. It is much easier for anyone learning a new system to digest it in smaller pieces. Your users will make fewer mistakes and be more efficient (and less annoyed) if they can tackle each new phase one at a time instead of trying to learn a very complex system all at once.